

In WEEK 02 of Computer Animation Fundamentals, Professor George Toombes explained to me about the 12 principles of animation and overlapping concepts. He went back to the basics and talked about what is required for any animation to start. There are 12 main principles:
a) Squash and Stretch
b) Anticipation
c) Staging
d) Straight Ahead Action and Pose to Pose
e) Follow Through and Overlapping Action
f) Ease In, Ease Out
g) Arcs
h) Secondary Action
i) Timing
j) Exaggeration
k) Solid Drawing
l)Appeal
He also discussed our previous week’s assignment, the bouncing ball, and explained how this simple concept is used everywhere in the animation industry. He presented a reference video “Everything is a Bouncing ball” where he showed me how the bouncing ball principle can be seen in different characters and movements. In one example, I saw a duck jumping, and in its first rough design, instead of a full body, only circles were used to represent its movement. Those circles bounced with the same kind of physics I learned from the bouncing ball exercise. In another example, there was a dog running, and its head and body were drawn as bouncing balls in the early sketches, showing how the body parts catch up with each other using the same principles. In the next scene, multiple bouncing balls appeared together to form a human character. This was to help me understand that even human bones and joints move like bouncing balls, they have secondary reactions and respond to each other with the same kind of motion. Different ball sizes and shapes working together can create the basic motion of a human or animal figure. This helped me understand how the idea of bouncing balls is not only for one object but also helps in creating complex animations.
After that, he introduced me to three Overlapping concepts in Animation that would be useful for this week’s assignment which includes:
a) Follow Through
b) Successive break Joints
c) Drag and Wave Principle
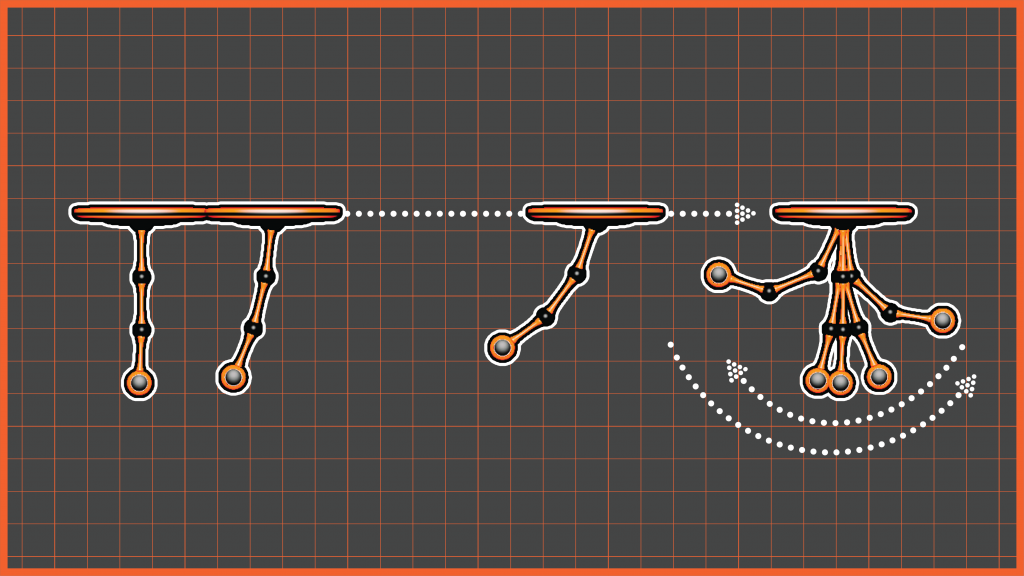
These were going to be part of the new pendulum assignment. Professor George showed me his version of the pendulum animation, which was more detailed and had multiple motions. But for me, he asked to focus only on a simple straight-line motion to make sure I clearly understood the basics first.
Step 1: Understanding the tutorial
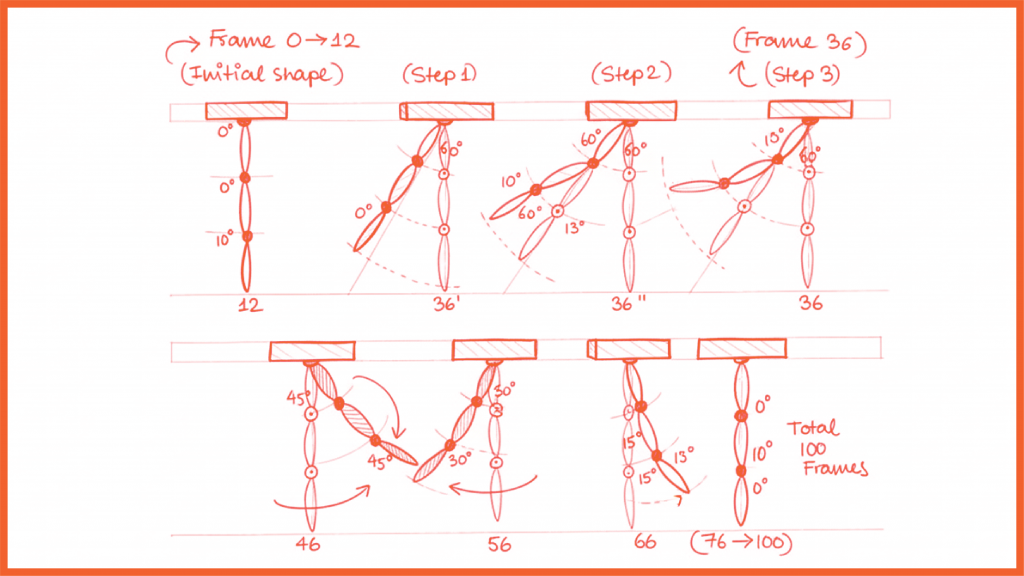
Step 2: Time Chart and Planning Sketch
Step 3: Composing the Final Animation
Step 4: Adding skins to the Render
Step 5: Receiving the Feedback
Professor George said that he really liked my animation and there was nothing wrong with it and he mentioned that it worked well from a Cartoon animation point of view. However, since I was focusing on physics this time, he suggested one small change which was:
“The pendulum holds its position a bit too long at the start of the pendulum motion. Try making another version where it doesn’t hold for so long.”
Step 6: Recomposing the Final Animation
Based on the feedback, I created another version of the animation where the pendulum moved more smoothly without holding its position too much. This helped me to see the difference between animation for style and animation for real-world motion.