

In WEEK 01 of Computer Animation Fundamentals, Professor George Toombes gave me a brief introduction about the course structure. He explained about the assignments, the submission process, timelines, critique system, and also about keeping a weekly progress blog.
I was also introduced to a 3D design software called Autodesk Maya. This software will be an important part of the course, and most of the assignments will be done using it.
Professor George also gave feedback on my portfolio and guided me on how I can improve further. He shared a small idea of how he prefers the work to be done, with the words,
“Quality over Quantity”
After the course introduction, he went back to the basics and talked about some important animation terms. He suggested reading “Richard Williams – The Animator’s Survival Kit”. The focus is on building a strong foundation, paying attention to small details, and learning the right way of developing animations.
Then, Professor George took me through Maya software and showed me the process of making a bouncing ball animation. He started with creating project files, importing assets, rigging the ball, marking keyframes, and using the graph editor to smoothen the animation and control timing. He also explained basic animation terms like stretch and squash.
At the end, I was given my first assignment for Week 01, which is to make the bouncing ball animation on my own. The first step is to create a sketch plan of the ball’s movement. This will help me to divide the time gaps and understand concepts like stretching and squash, impacting, and expanding. After the sketch, I will make a bouncing ball animation in Maya. This will also help me to learn Maya’s basic tools, setting up project frames, polishing animation, and using render engines.
There were also strict guidelines given to me about choosing references. I must only use a real bouncing ball video as a reference, and not any animation that is already made by others.
Step 1: Choosing the Reference
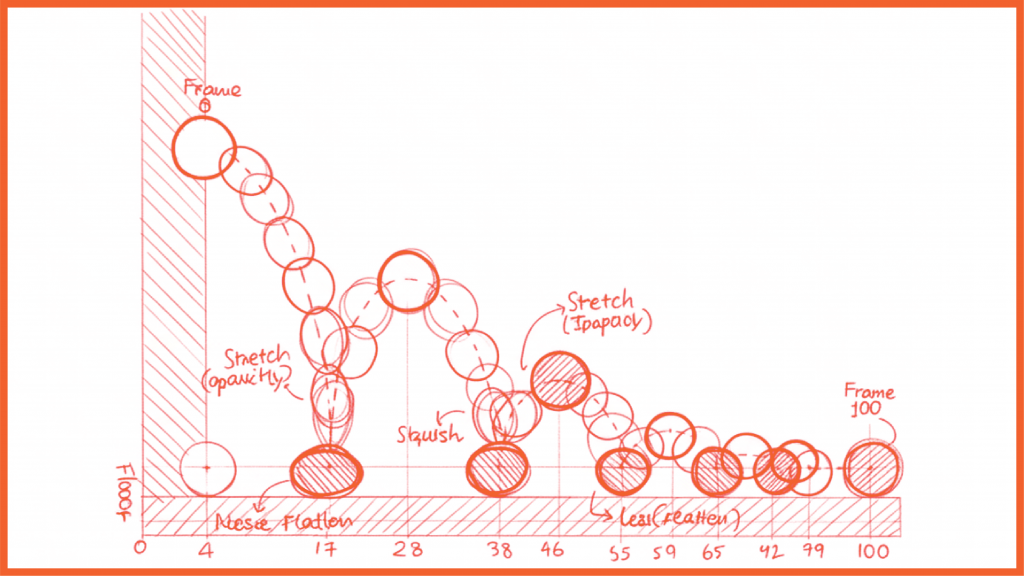
Step 2: Time Chart and Planning Sketch
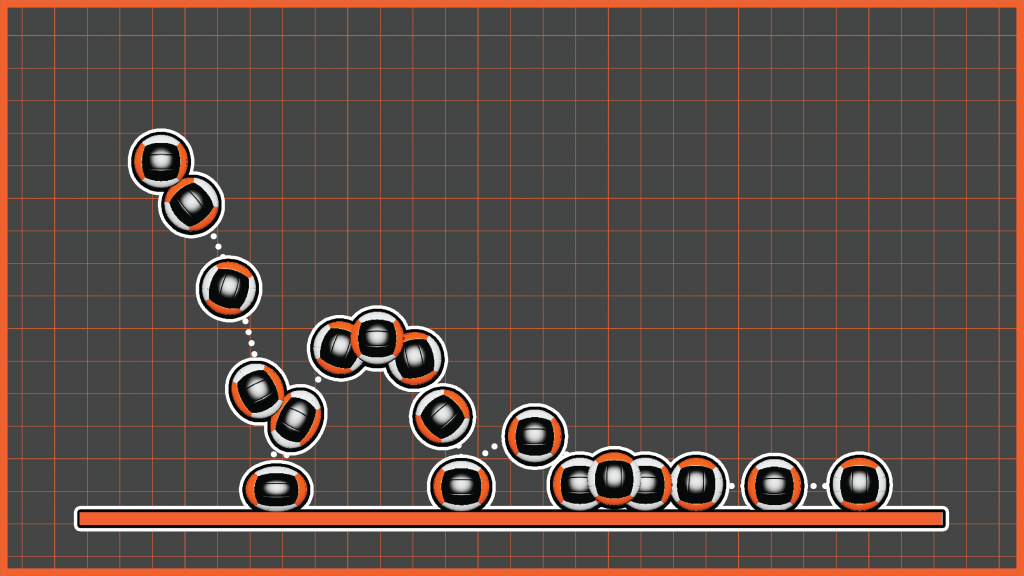
Step 3: Developing the Animation
a) Blocking Key positions and Timing
b) Refining space with Graph Editor
c) Adding Rotation
d) Applying Squash and Stretch Principles
Step 4: Composing the Final Animation
Step 5: Receiving the Feedback
After I submitted my animation, I received two main feedback points from Professor George:
“The gap between each bounce should get shorter, right now, it feels a bit odd.”
“There is too much rotation and the rolling speed at the end. Try to slow both down for a more natural look.”
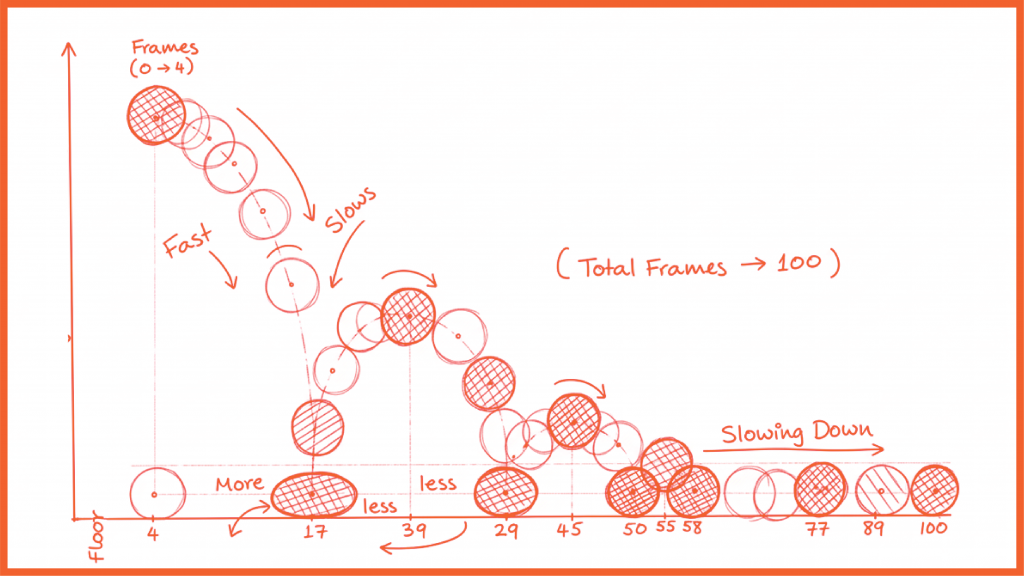
Step 6: Revising the Time Chart
Based on the feedback I received, I went back to my sketch plan and did some replanning. I carefully adjusted the timing for each bounce so that the gaps between them got shorter, just like how a real ball behaves when it loses energy after every bounce. I also paid more attention to how the ball slows down before coming to a stop. This replanning helped me to better understand the importance of timing and spacing in animation.
Step 7: Recomposing the Final Animation
After finishing the new sketch, I worked on the recomposed animation in Maya. I applied the updated timing and reduced the rotation and rolling speed at the end, as suggested. I also checked the motion in the graph editor to make the curves smoother and more natural.